Introduction
The goal of this project is to implement a selection technique in VR with
Unity. We will be in a supermarket, and the goal is to pick items in the
aisles.
This project has been done with Onur Basci.
We chose to use portals to make the selection, as in the game Portal. The idea
is to place a portal in the scene, so we can see and grab items through it.
This technique presents many advantages:
- No need to move: the portal can be placed anywhere
- Grab low and high items: the portal can be placed at any height, no need to crouch or take a ladder
Portal Implementation
To make the portal, we need to use a second camera to capture what we see through it. To do this, camera placement is important. To do so, the local coordinates and rotation of the virtual camera relative to the second portal need to match the player camera relative to the first portal. Because we are in VR, we need to do this twice, once per eye.
(source)
To do this, we created an empty object to become the parent of the virtual
cameras. Then we created a script and attached it to each camera of the
player to get the local coordinates relative to the front portal. Unity has
a nice function that does it called InverseTransformPoint. To get the local
rotation, we have to remove the rotation of the front portal from the player
rotation. We can do this by inverting the rotation using Unity's function
Quaternion.Inverse.
Then we can apply the local transform and rotation to the virtual camera.
    void LateUpdate()
    {
        // Local position relative to frontPortal
        Vector3 localPosition = frontPortal.InverseTransformPoint(transform.position);

        cam2.transform.localPosition = localPosition;

        // Local rotation relative to frontPortal
        Quaternion localRotation = Quaternion.Inverse(frontPortal.rotation) * transform.rotation;

        cam2.transform.localRotation = localRotation;
    }
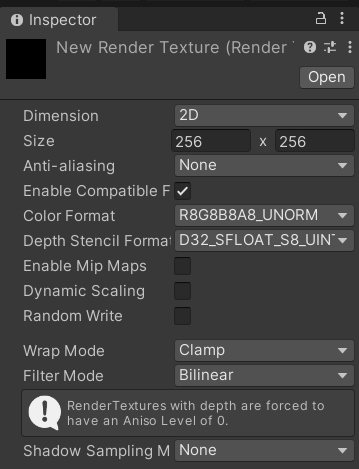
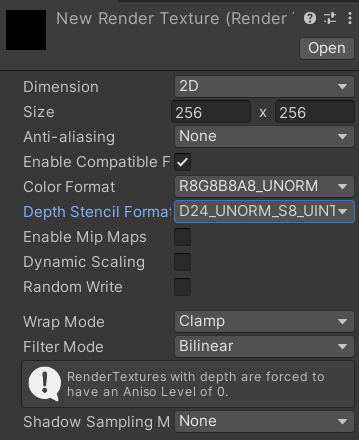
Once we have the image, we need to display it. To get the output of the camera, we can use a Render Texture. At first, we created an object and attached it to the camera object with the inspector. Then we created a shader graph to display the texture.
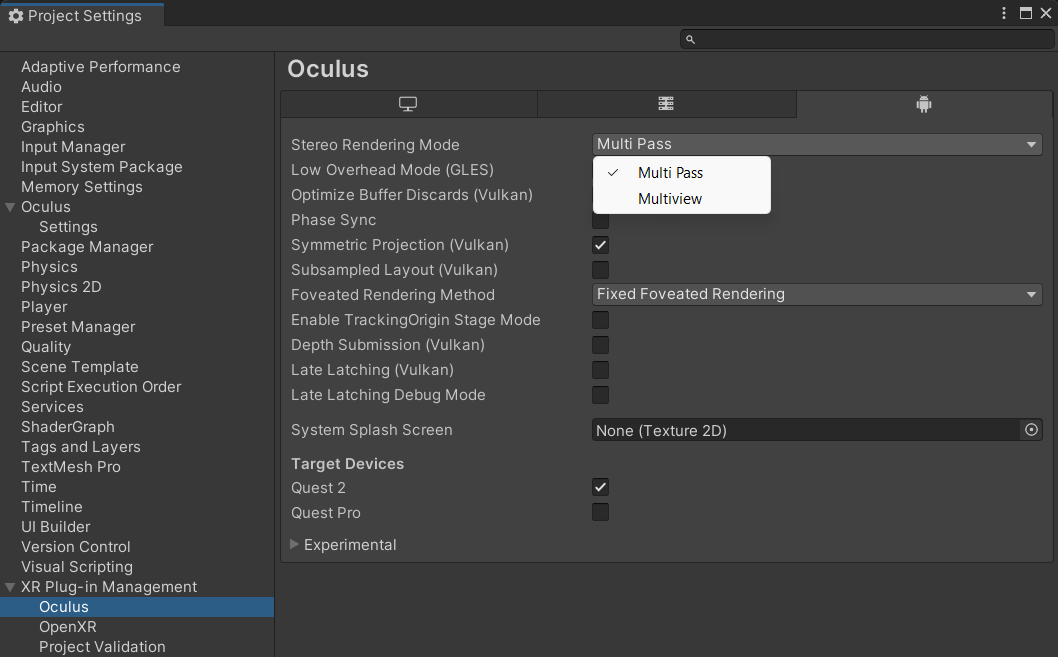
The first issue happened. The texture appeared well when we tried it on the computer, but was purple on the oculus. It was not the case with a built-in shader, so we searched on the internet how to fix it. We started to change the parameters of the project, by deactivating Vulkan as a renderer. But it seemed that it was an issue with the format of the render texture. By default, the format of the depth stencil is D32_SFLOAT_S8_UINT, but changing it to D24_SFLOAT_S8_UINT made it work.
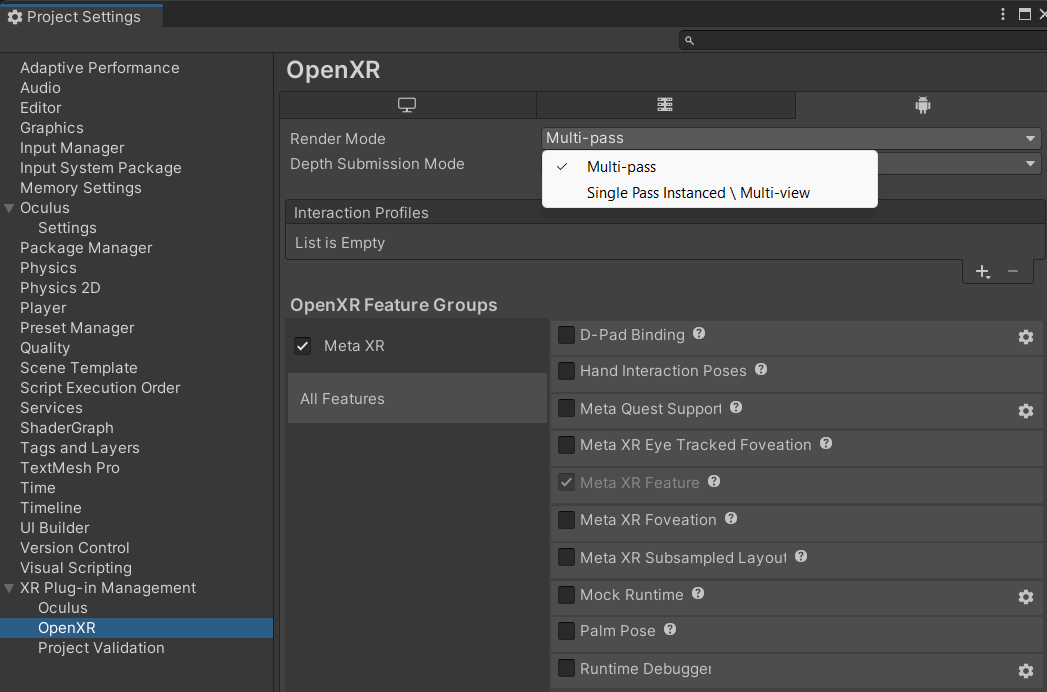
Then the texture appeared well on both the computer and the headset, but there was another issue. The quad that was used to display the texture appeared in a different place depending on the eye with the headset. We cannot take a photo of each eye so it's difficult to describe, but essentially, the quad was in a good place with the right eye, but was fixed on the screen on the left eye. To fix this, we went again in the project parameters, and changed the stereo rendering mode to “Multi-pass”, instead of Multi-view.
To explain briefly, Multi-pass renders the scene twice, once for each eye, which is more flexible but computationally expensive. Multi-view renders both eyes in a single pass using GPU instancing, making it much faster but requiring modern hardware. Our theory is that shader graphs were not compatible with Multi-view in our version, that is why they couldn't place the quad right.
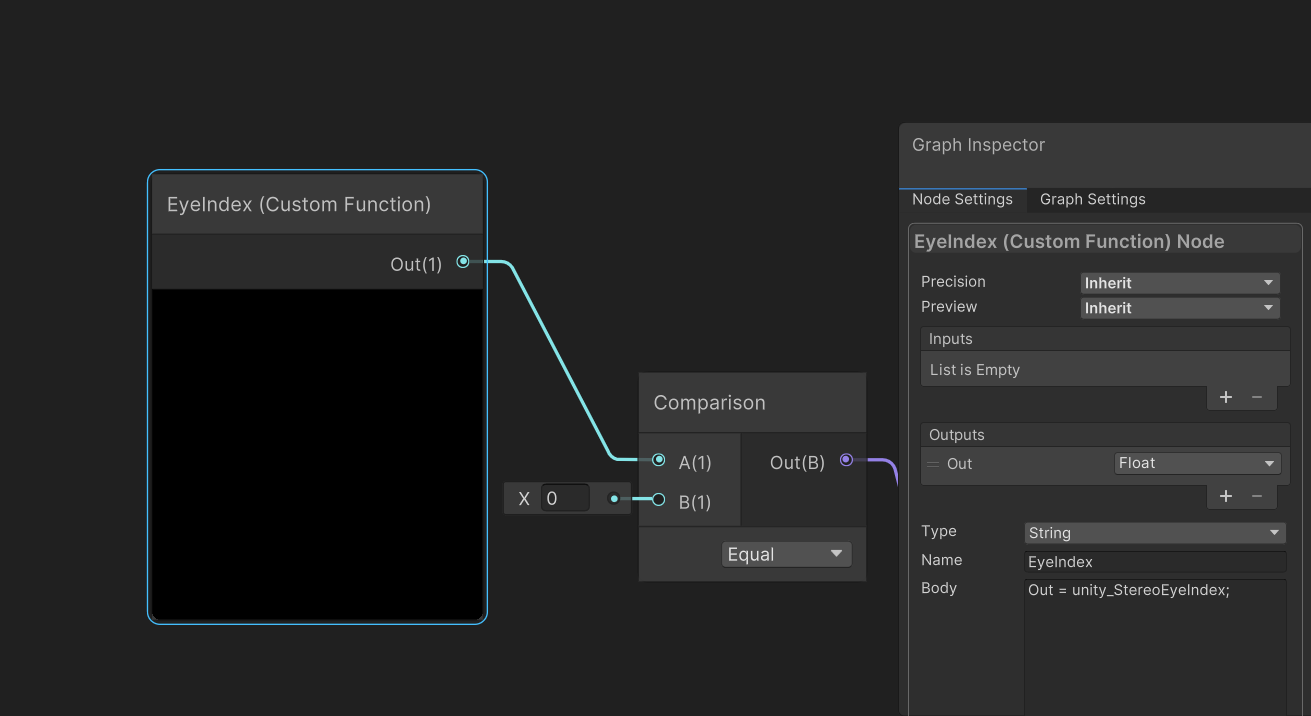
But now we have our quad with the texture. But we need to display one texture for each eye. In the shader graph, there is a node called Eye Index, so we used it, but it did not work… To fix this, we created a custom node that returns the variable unity_StereoEyeIndex.
Now that we have a different texture for each eye, we need to display the texture well. For the moment, we used the default UV coordinates of the quad to display the texture. To test the portal, we put the virtual camera at the same place as the player, and the expected result is to have a completely seamless portal. But that is not what we have.
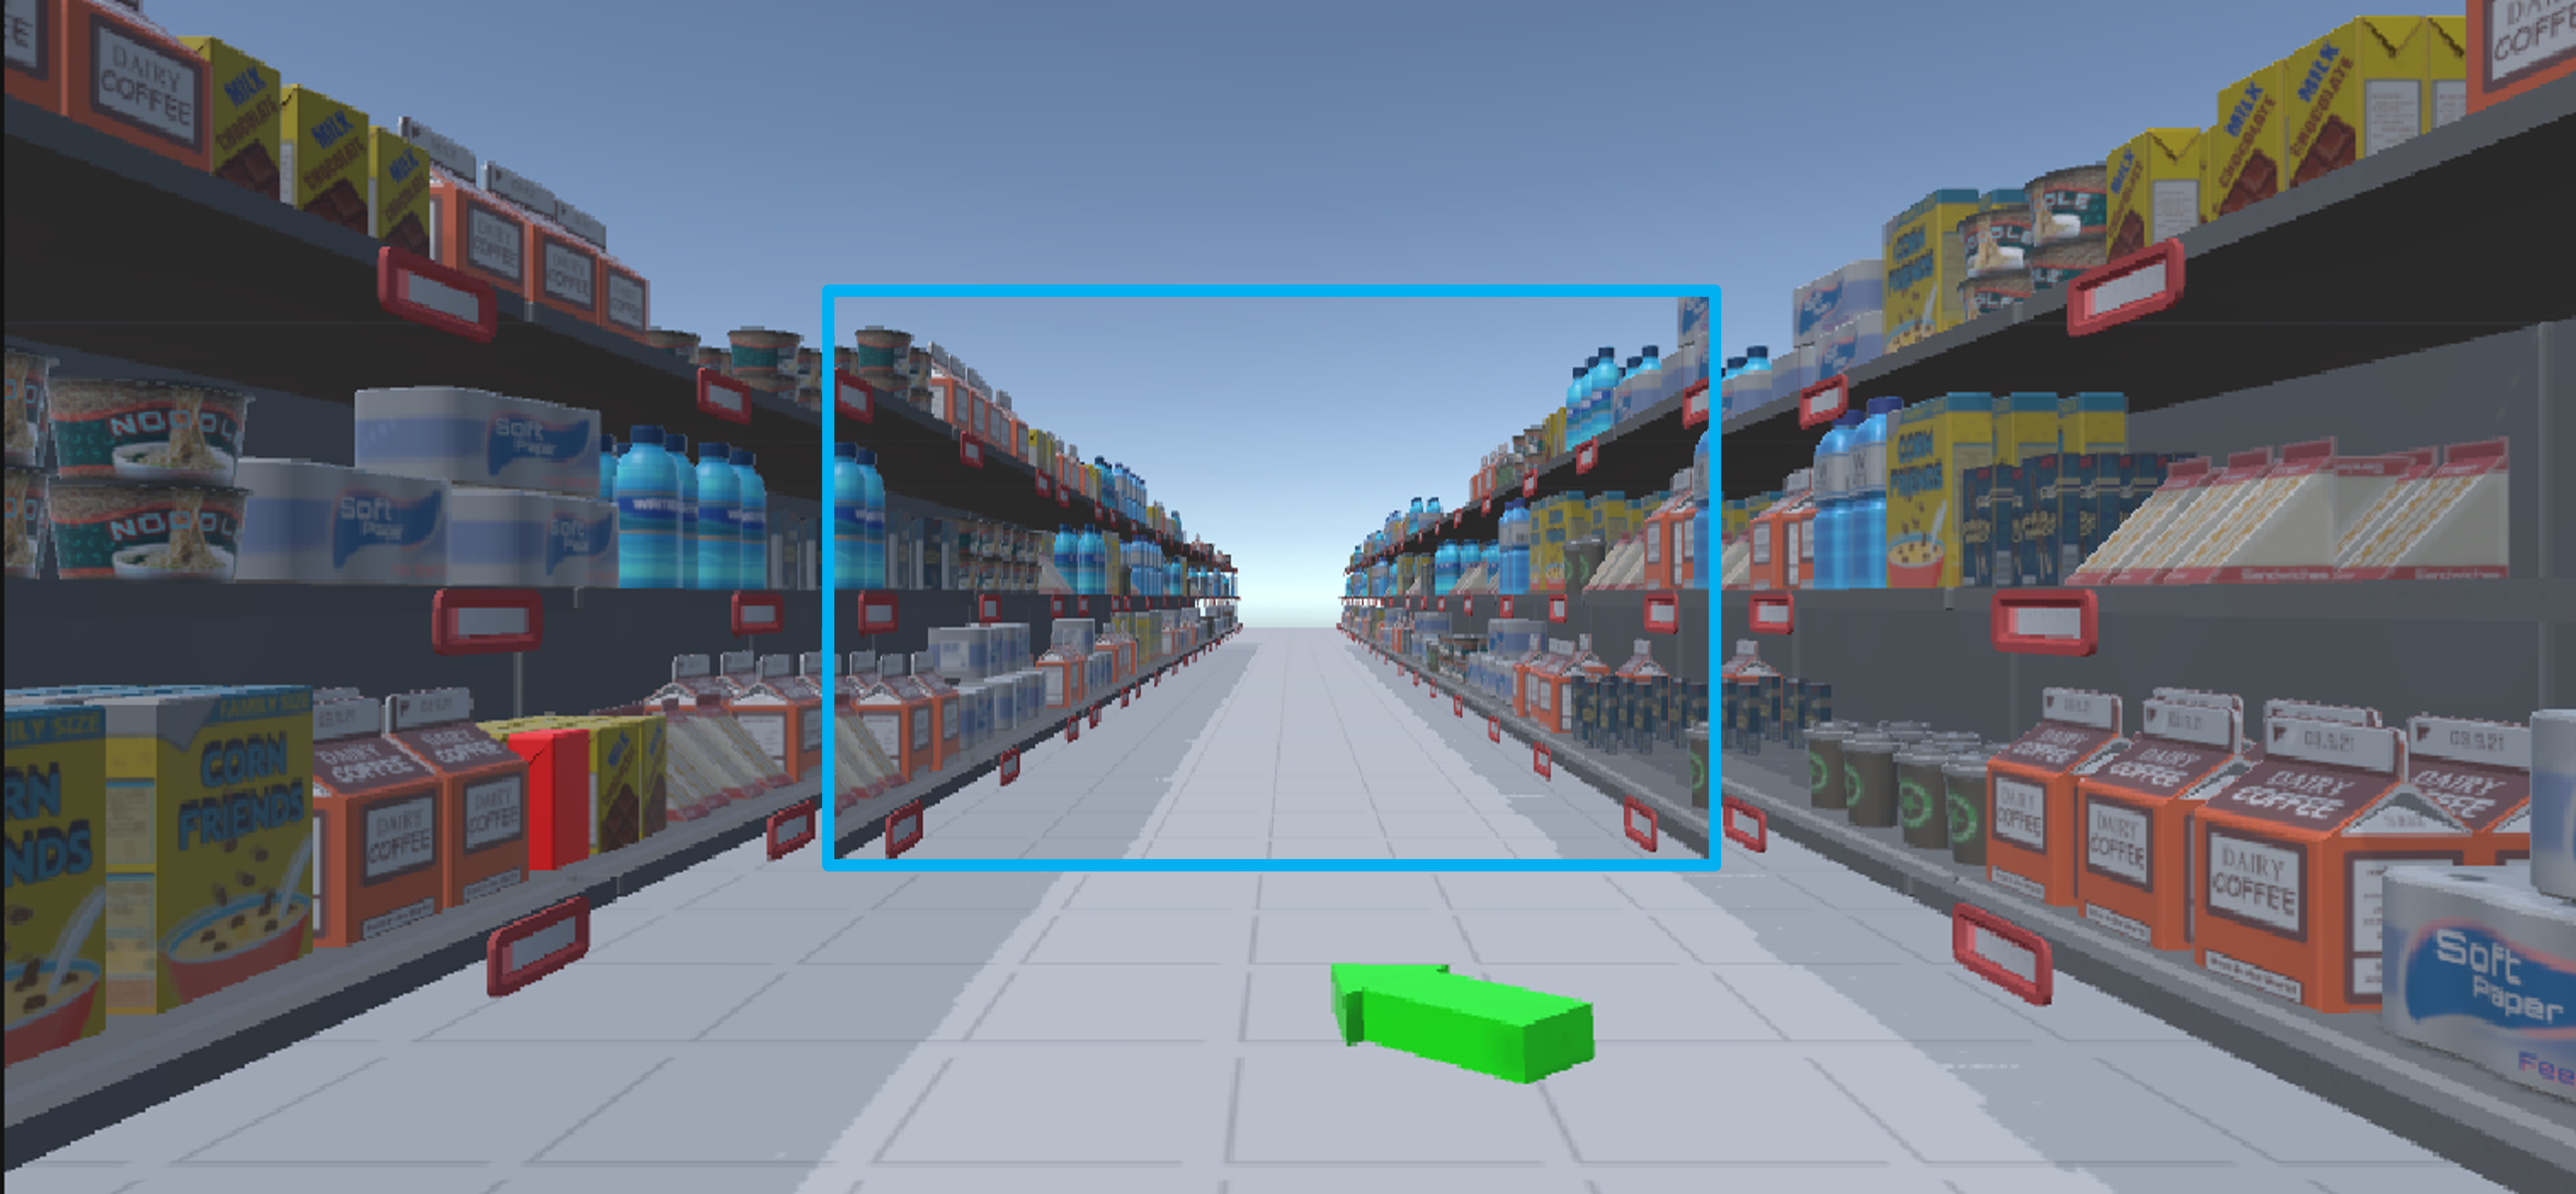
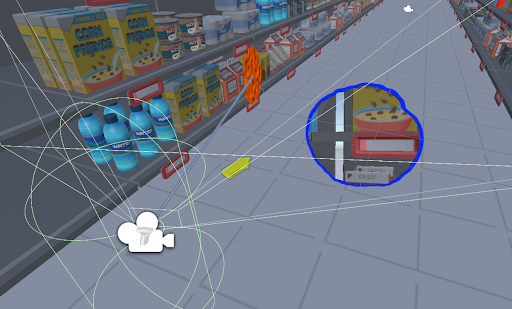
This puts the entire texture on the quad, but we only need a fraction of it, because the portal does not take up all the screen. Instead we should use the screen coordinates that will crop the texture to fit the portal. We obtained an image like this (we added a blue contour to better see the portal):
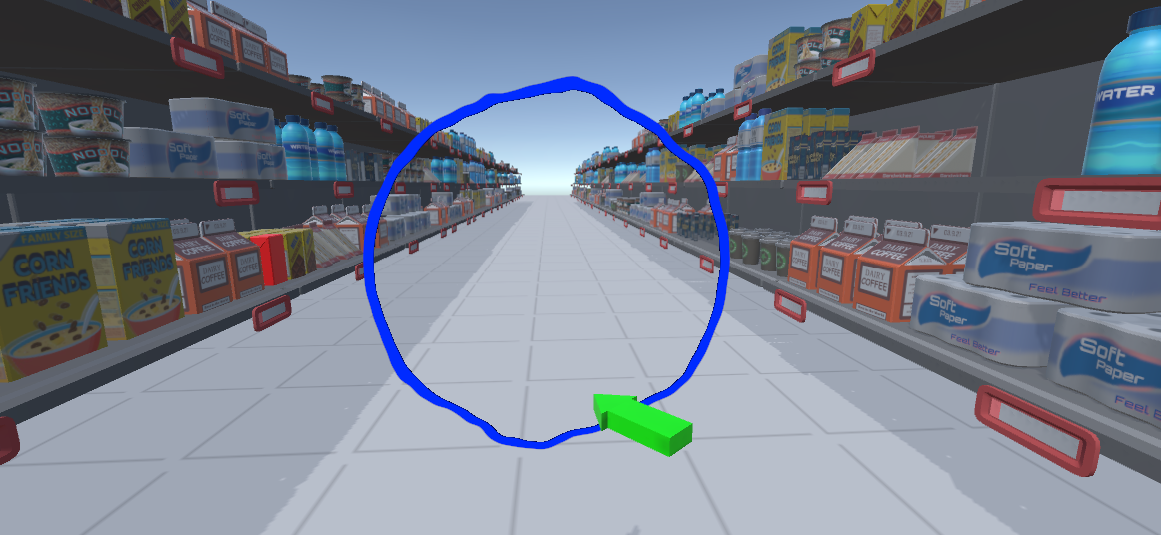
Here the result is better, but it is not completely seamless. Also, it is even worse on the headset, because the two images differ and the texture seems duplicated. This is because the render texture does not have the same ratio as the camera, so the texture is stretched in one direction. To fix this, instead of assigning a render texture to the camera output in the inspector, we create the texture with a script and attach it here. Here, we can get the size of the screen by using XRSettings.eyeTextureWidth with the headset or Screen.width with the computer. After that, the result was seamless on the computer. We also added a nice border effect by playing with some noise and achieved this result:
For the first time, we had a texture that appears right on both eyes! But it was not yet perfect. The aspect ratio was still wrong. But we fixed this by changing the projection matrix of the cameras by copying the one used by the main camera. Afterwards, we finally had a seamless portal on the headset.
Selection Technique Implementation
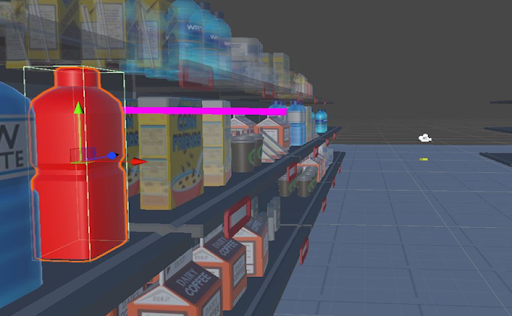
For the implementation of the portal selection technique, we essentially need to perform two ray casts. The first ray originates from the camera position, and if it intersects with the portal, we cast a second ray starting from the second portal.
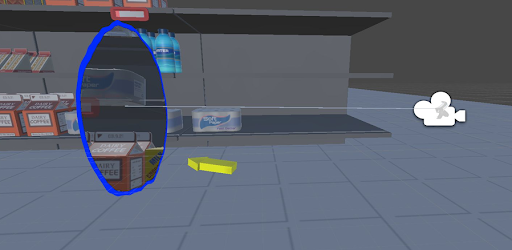
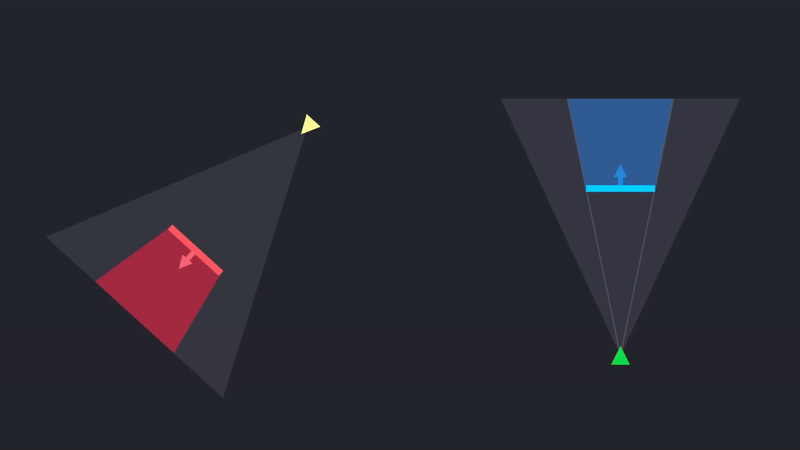
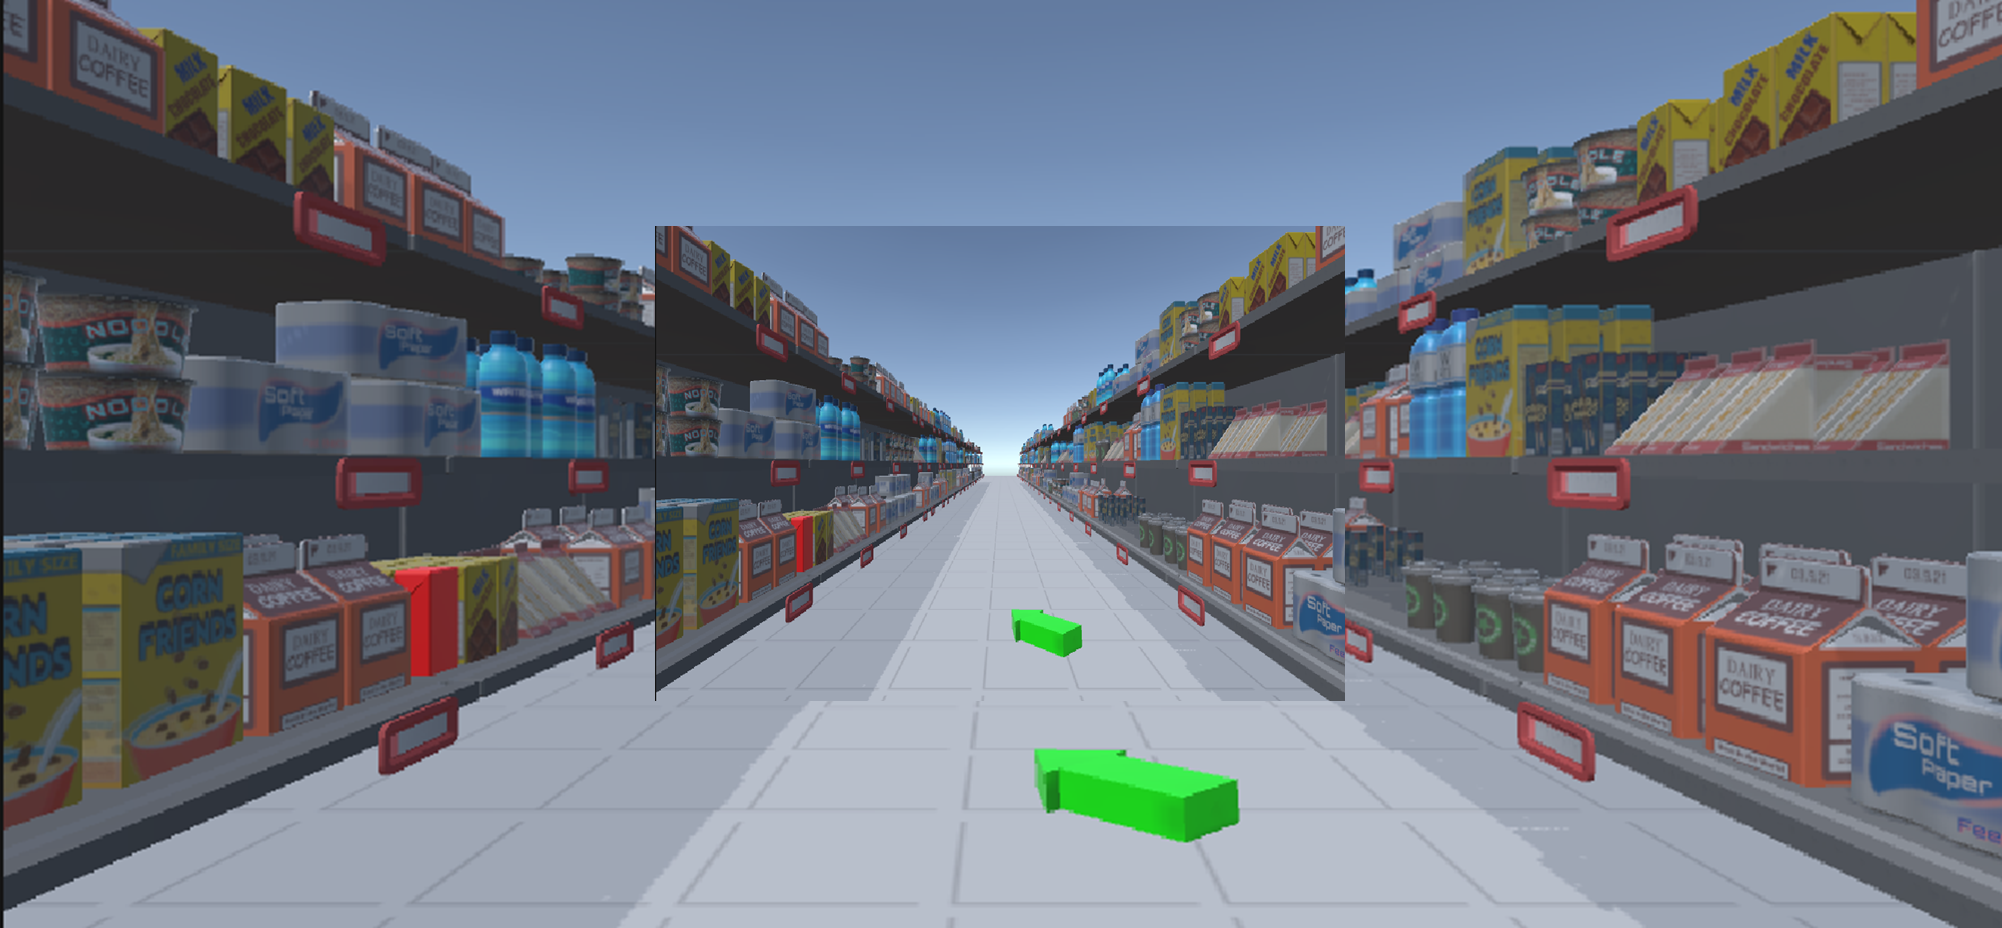
The user should also be able to choose the position of the second portal. Since allowing the player to place the portal in a full 3D space was somewhat challenging, we simplified it by restricting placement to invisible planes. We placed two invisible planes next to the left and right shelves and checked whether the ray from the player's position intersected with one of these planes. If the player presses the "A" button on the right-hand controller, the second portal is placed at that position.
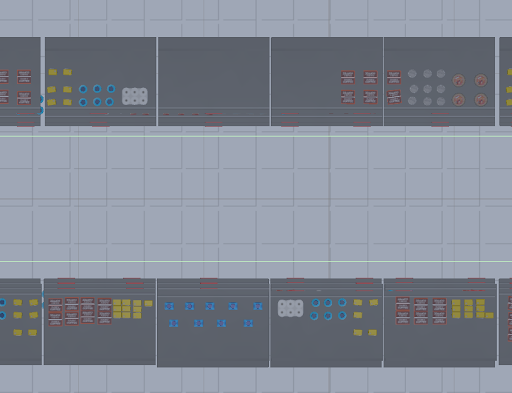
Illustration of Two invisible planes(Green Line Represents Their Collider)
Since it was initially difficult for the user to determine the placement of the second portal, we added an orange portal (similar to the one in the game) to indicate the intersection position. When the player moves the controller, the orange portal follows the intersection position.
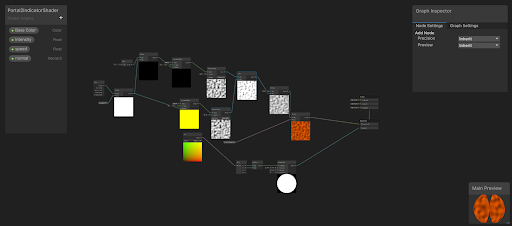
We also wanted the second portal to resemble the one from the Portal game. To achieve this, we created a shader graph that combines moving noise with sphere filtering.
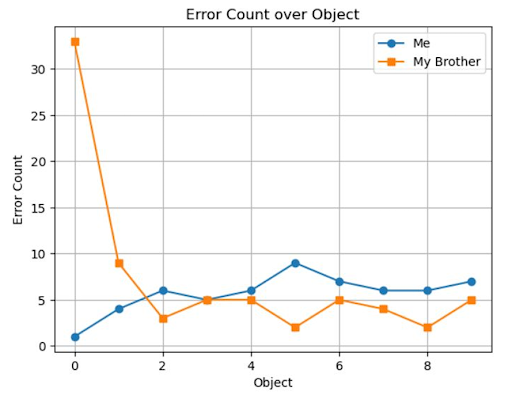
Testing
I tested the selection technique with my brother and observed two key metrics:
- Selection time per object
- Error count
This was my brother's first time using a VR headset. Initially, he had some difficulty understanding the selection technique, but once he grasped it, he was able to select objects easily. The figure below shows that selection time and error count remained stable, except for the first few objects.