Qt Lab #3 : Statecharts
Eric Lecolinet
-
Télécom Paris
-
Dept. INFRES
Useful links
Goal
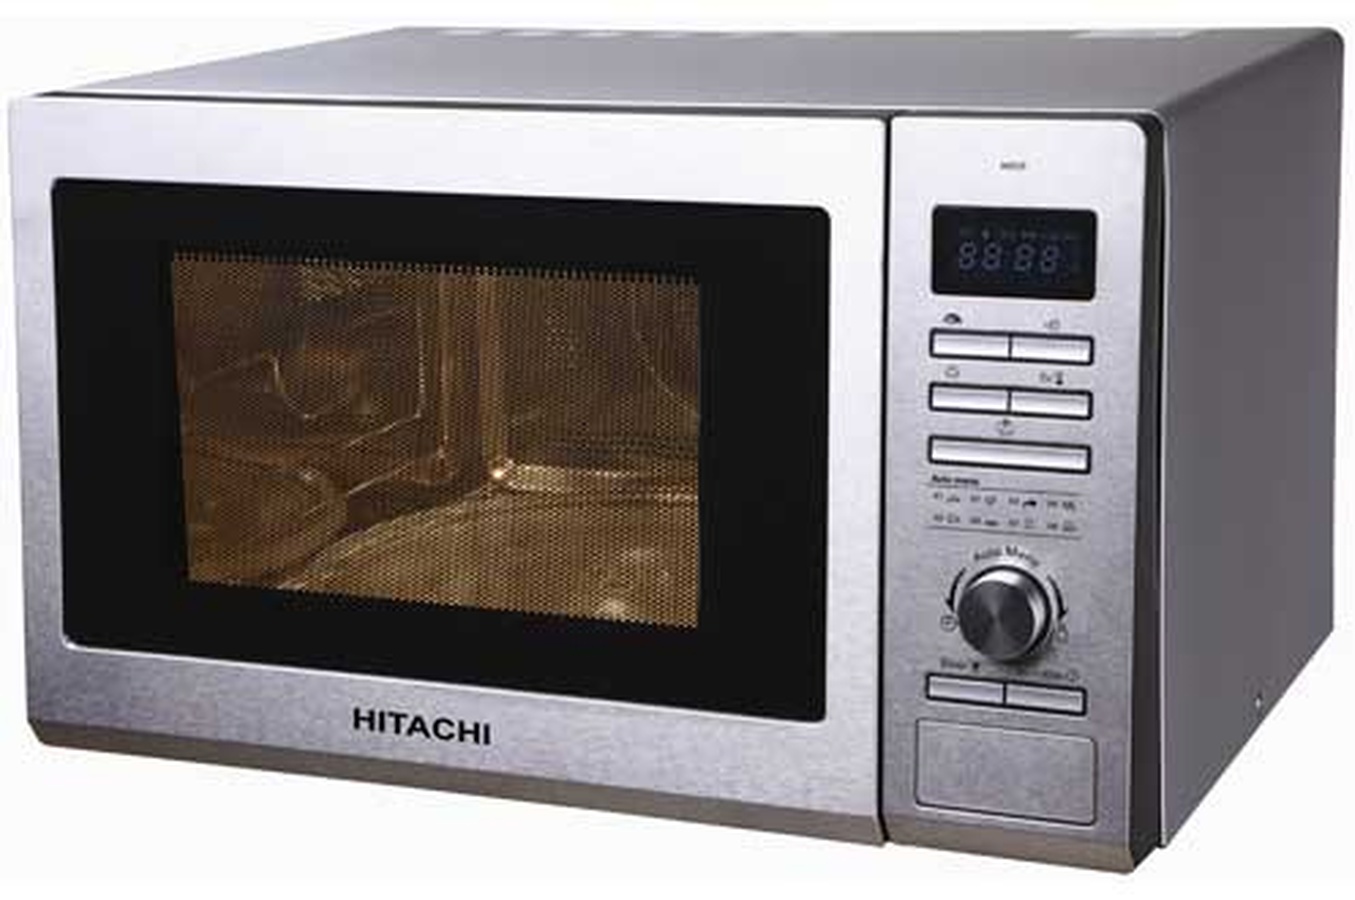
The goal of this Lab is to implement the presentation and interaction parts
of the control panel of an (actual) microwave oven.
Step 1: Design the Statechart
Draw (on a sheet of paper [think about taking a picture])
or using a computer tool) the Statechart implementing
the desired behaviour.
The buttons on the microwave panel are:
-
Clock: Sets the hours (by clicking once), then the minutes (by clicking again),
a third click validates.
-
Power: Adjusts the power, from 0 to 100% (first click),
then the cooking duration (second click). The oven can then be started
by clicking on Start.
-
Mode: Sets the mode: microwave, grill, microwave+grill (first click),
then the cooking duration (second click). The oven can then be started
by clicking on Start.
-
Defrost: Adjusts the cooking duration according to the weight
of the food to be defrosted. The oven can then be started
by clicking on Start.
-
Auto Menu: Not used in this Lab
-
Dial: Rotary knob that allows choosing a value. This value depends
on the selected state (e.g. when setting the hour, it changes the hour,
when setting the minutes, it changes the minutes, etc.)
-
Start: Starts cooking.
-
Stop: Stops cooking or cancels any operation.
Note that, when a setting sequence is started, no other button is active,
except the Stop button, which cancels any operation.
For instance:
-
If Clock: is clicked, only this button (and Stop)
is active until the clock is set.
-
If Power: is clicked, only this button (and Stop)
is active until the power and the duration are set. Once done,
clicking on Start starts cooking with these settings.
The Start button can be clicked:
-
At the end of a Power, Mode or Defrost sequence
-
When the oven is idle, in which case the oven starts cooking with
default values (60 seconds, full power).
-
When the oven is cooking, in which case the cooking time is
increased by 60 seconds.
The display panel shows different information depending on currently
active state. For instance:
-
When setting the hour it shows the hour, when setting the power it shows
the power, etc.
-
When the oven is idle it shows the current time, as a normal clock
-
When the oven is cooking it shows the remaining cooking duration
Finally:
-
The clock should display the current time, as a normal clock (only when
the microwane oven is idle)
-
The microwave oven should stop cooking when the cooking duration has
expired.
Step 2: Create the graphical interface using QtCreator
You can now create the graphical objects GUI, either by using Qt Designor
(which is part of Qt Creator) or by programming them directly.
Think about giving intelligible names to your widgets to make programming
easier in the following questions.
Notes:
-
See requirements
to install the State Machine module.
-
If possible, use qmake (not CMake!)
-
A QLineEdit can, for instance, be used to implement the display panel
(there is also a widget that displays LED numbers).
-
Qt provides a rotary knob (QDial) that roughly works as a slider.
Step 3: Implement the Statechart and link it to the GUI
You can now implement the QtStateMachine, its states and
its transitions.
This should typically this be done in the constructor of the MainWindow
(or in a method called by the constructor). The
Transitions.h
header may help the writing the Statechart.
We will take care of temporal aspects (for displaying the current time on the clock
and stopping the oven) in the next question. As said before, the display panel
should show appropriate info depending on the selected state.
Once the implementation is completed, do some testing to verify that the
behavior is consistent with the specification set out in the previous question.
Step 4: Clock and cooking duration
The goal is now to make 1) the clock to work properly (it should be updated every second)
and 2) the oven to stop cooking when the cooking duration has expired.
For this purpose you'll need using QTimers (QTimer can send
a signal when a lapse of time has elapsed).
As said before, be careful to update the display only in the appropriate states.
Last Step: Improving the GUI
Give free rein to your imagination... :-)
Exercice Report
Please follow the following instructions to avoid mistakes
and undesirable problems:
-
Please check that your project compiles and executes correctly on
a Linux machine at Télécom. It not possible, explain which version of Qt
you have used and with which OS.
-
Write a short README indicating which questions you answered and
containing all explanations you'll find useful.
This file must be in PDF or in text format (UTF-8 encoding).
Do not forget to put your name in all files (especially in the README).
-
Create a directory called LastName__FirstName
(last name first please!). If your first or last name contains spaces, use _ instead.
Remove .o files, but keep the Qt designer .pro file.
Zip your directory, either in .zip or .tar.gz format
(no other format accepted).
-
Finally, upload your zip file to the IPP Moodle.
Eric Lecolinet
- http://www.telecom-paristech.fr/~elc - Telecom ParisTech


